How to Build a Limestone Paver Walkway
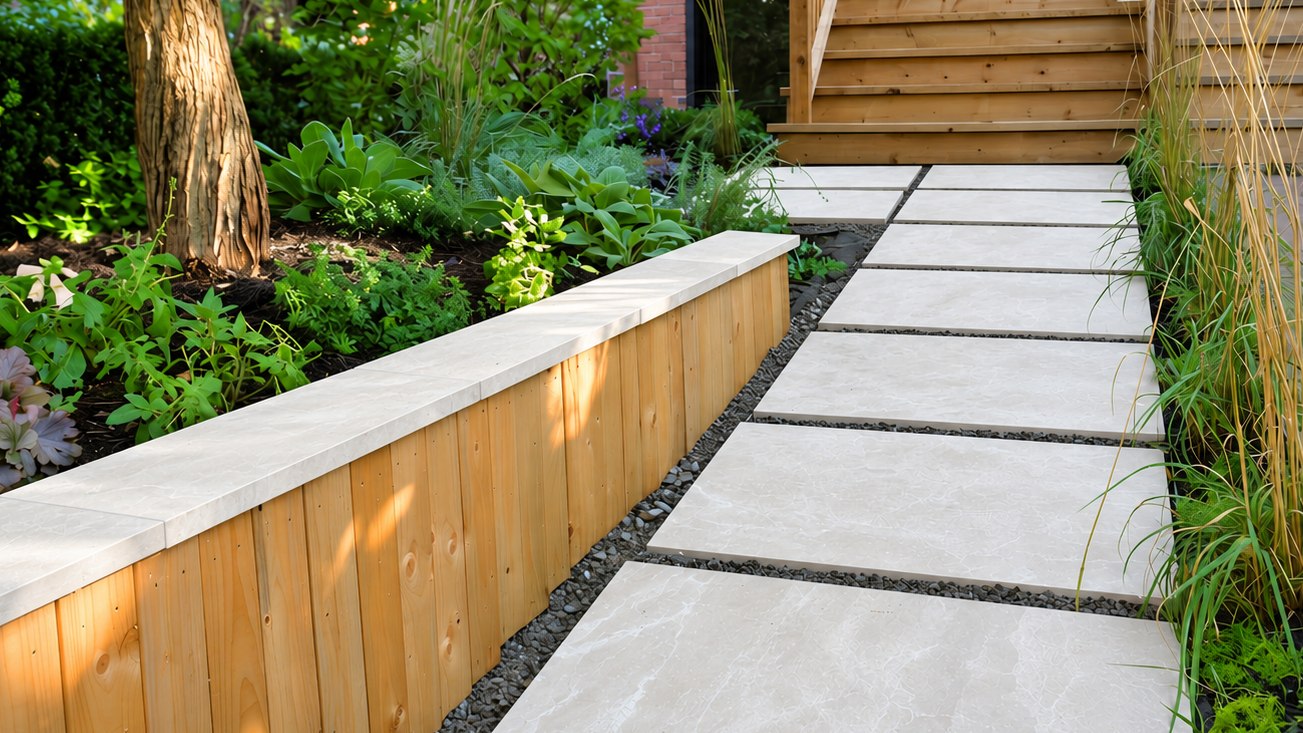
Eleven French Riviera limestone pavers on a permeable base, with edge restraints that keep them from shifting.
Tools & Materials You’ll Need View complete list
Tools
- Capped rebar stakes
- Mason’s stringline
- Line level
- 4′ level
- 2′ level
- Plate compactor (rental, approx. 150 lb)
- Hand tamper
- Notched screed bar
- Dead blow hammer
Materials
- 24 × 36 × 1 in. calibrated limestone pavers (11)
- ¾ in. clear stone
- HPB (high performance bedding), also used to fill the joints. In the U.S., ask for washed, angular ASTM No. 8 aggregate.
- 4 oz non-woven geotextile, 140+ GPM per sq. ft.
- Landscape staples (to pin the geotextile)
- Quick-E Hybrid Edge restraint
- Quick-E edge stakes for open-graded bases
- 2×4 spacer block
- Water-based impregnating sealer for limestone
Plan the Limestone Paver Walkway and Set Stringlines
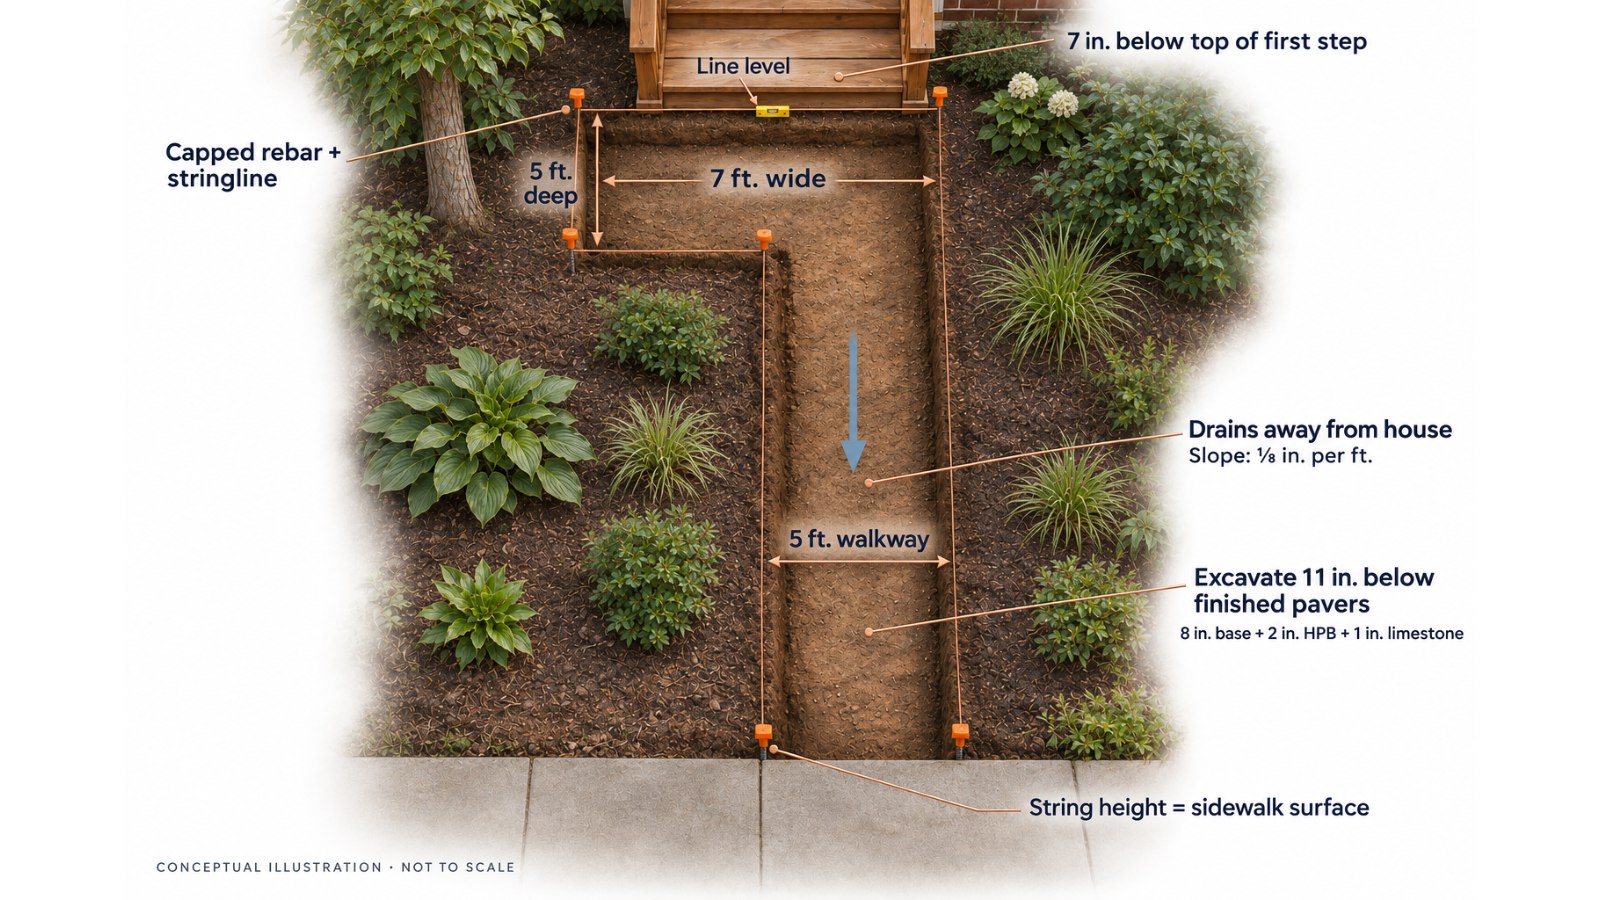
Mine sat 7 in. below the top step (match your existing risers) and in line with the sidewalk. The yard's natural slope gives the walk its drainage.
Dig 11 in. below the stringlines, the depth the limestone manufacturer recommends, and 6 to 8 in. past the paver edges. Hand dig near tree roots.
Prepare an Open-Graded Base for Limestone Pavers
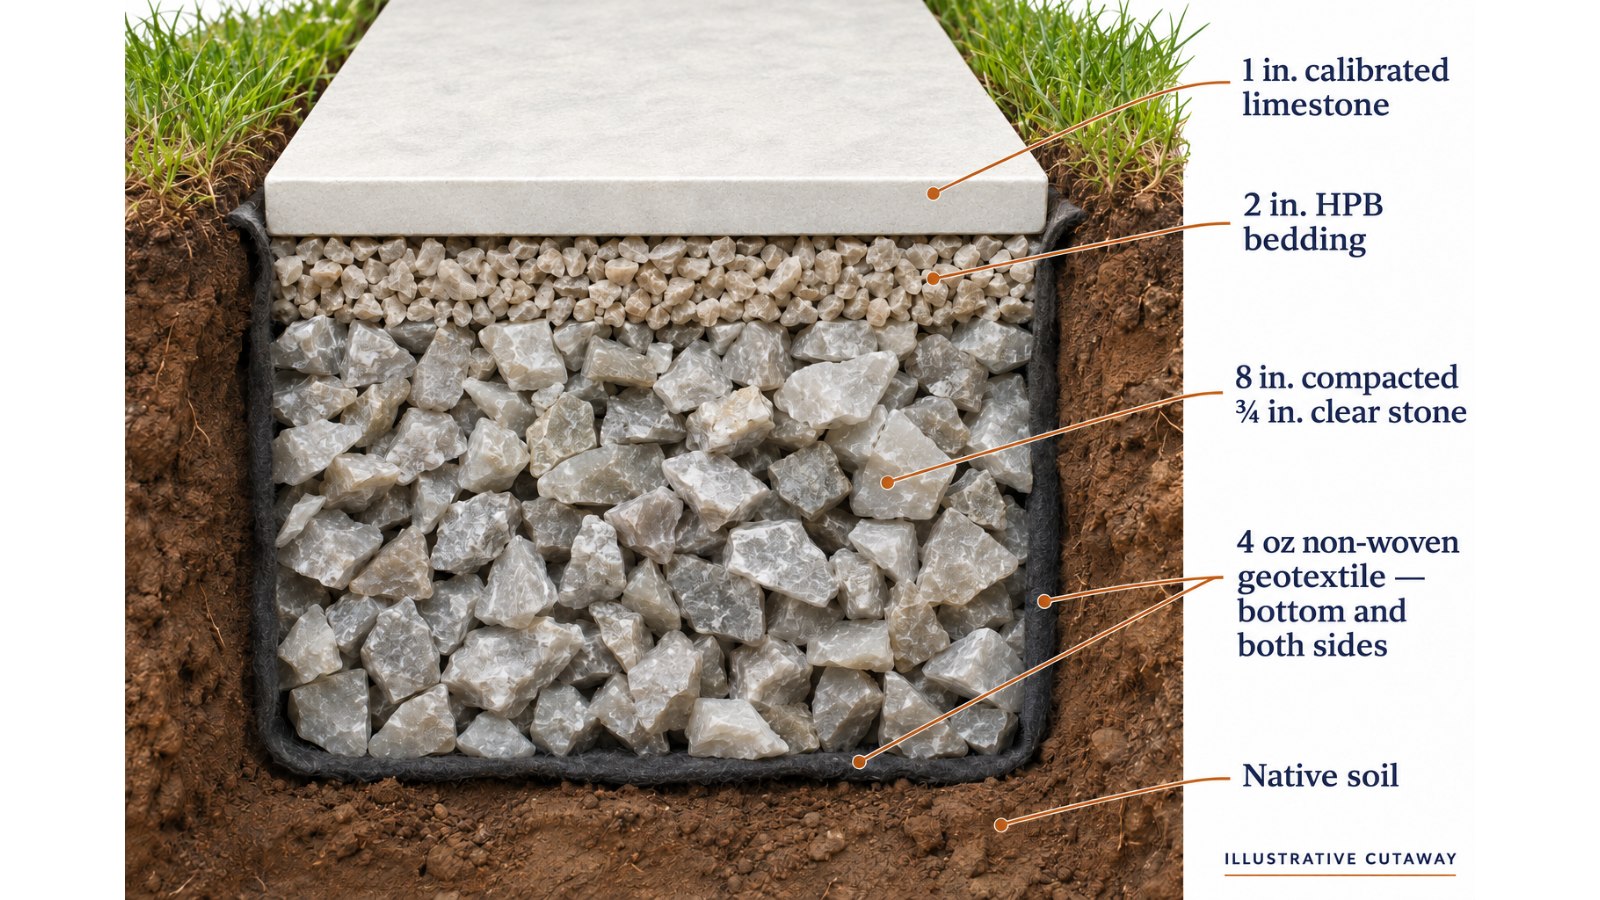
I followed the limestone manufacturer's recommendation: a permeable, open-graded base of clear stone topped with HPB. Water drains straight through, which reduces the risk of frost heave, but it still needs somewhere to go: soil that absorbs it, or an outlet at the low end.
Line the trench bottom and sides with 4 oz non-woven geotextile. I run it up the sides clean, the same way we do on our retaining wall builds.
Check the flow rate, also called permeability: how many gallons of water drain through one square foot of fabric per minute (GPM). Mine is rated 140+ GPM, tested to ASTM D4491, the engineering test for permeability.
Compact the Paver Base in Shallow Lifts
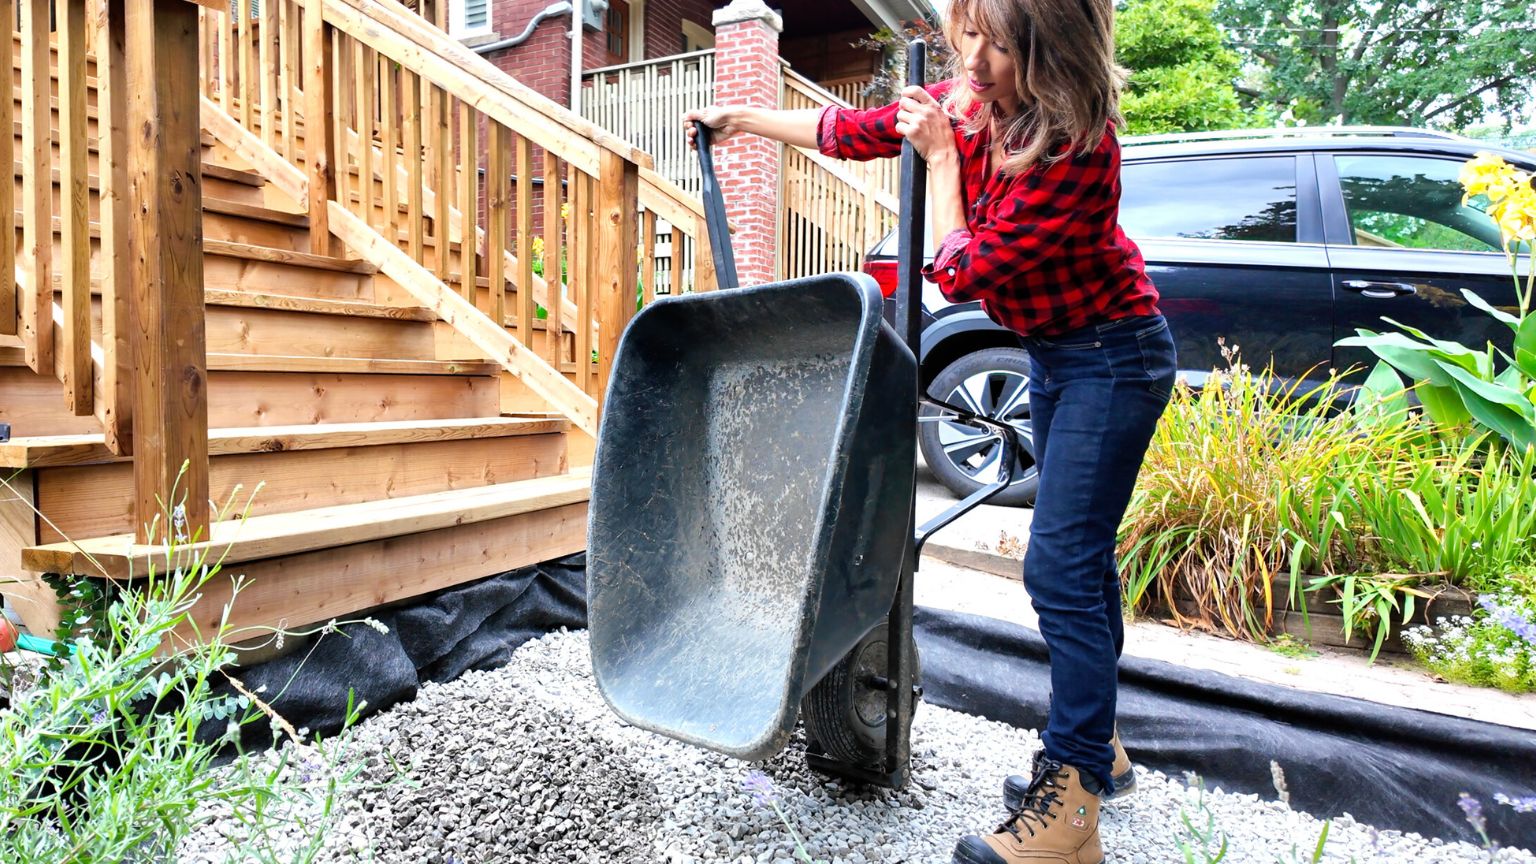
Spread the clear stone in 2 in. lifts and make several overlapping passes with the plate compactor on each one. I rented a 150 lb machine with sidewalk delivery.
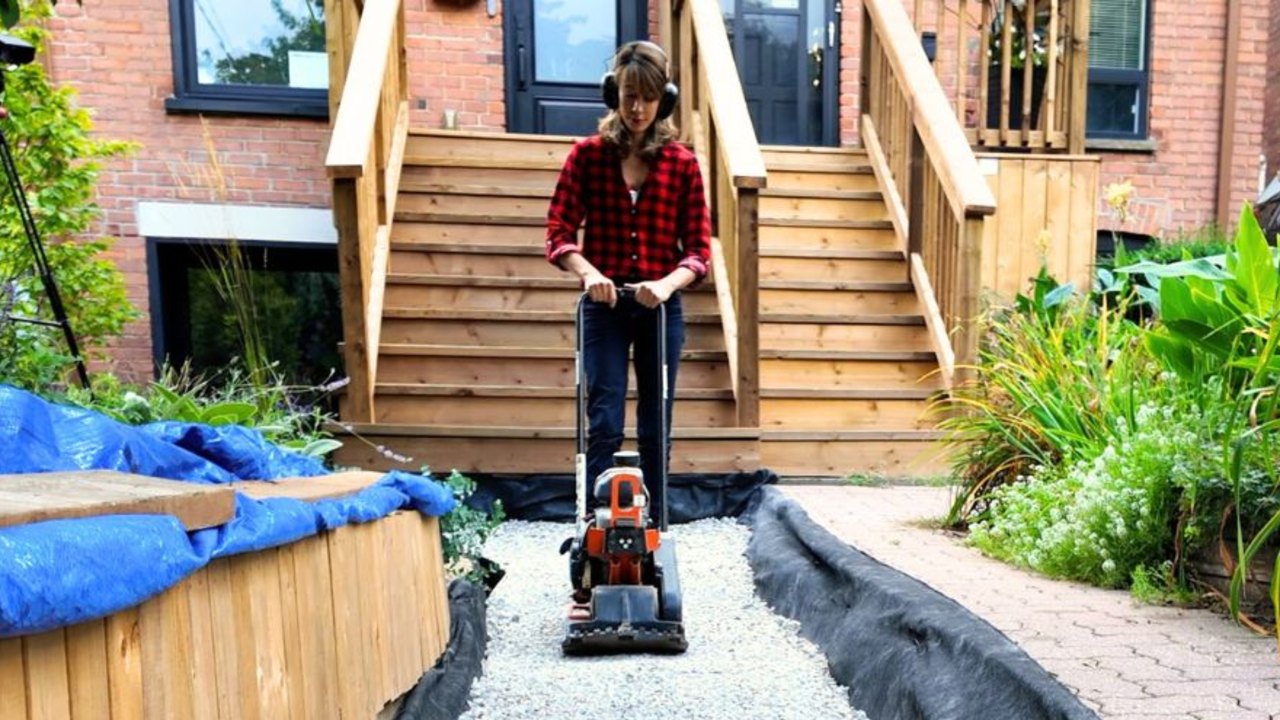
Before any HPB goes down, check that the compacted base sits 3 in. below the stringlines everywhere and is level side to side. Fix soft spots now; the bedding can't make up for a poor base.
Install Edge Restraints and Screed the HPB Bedding
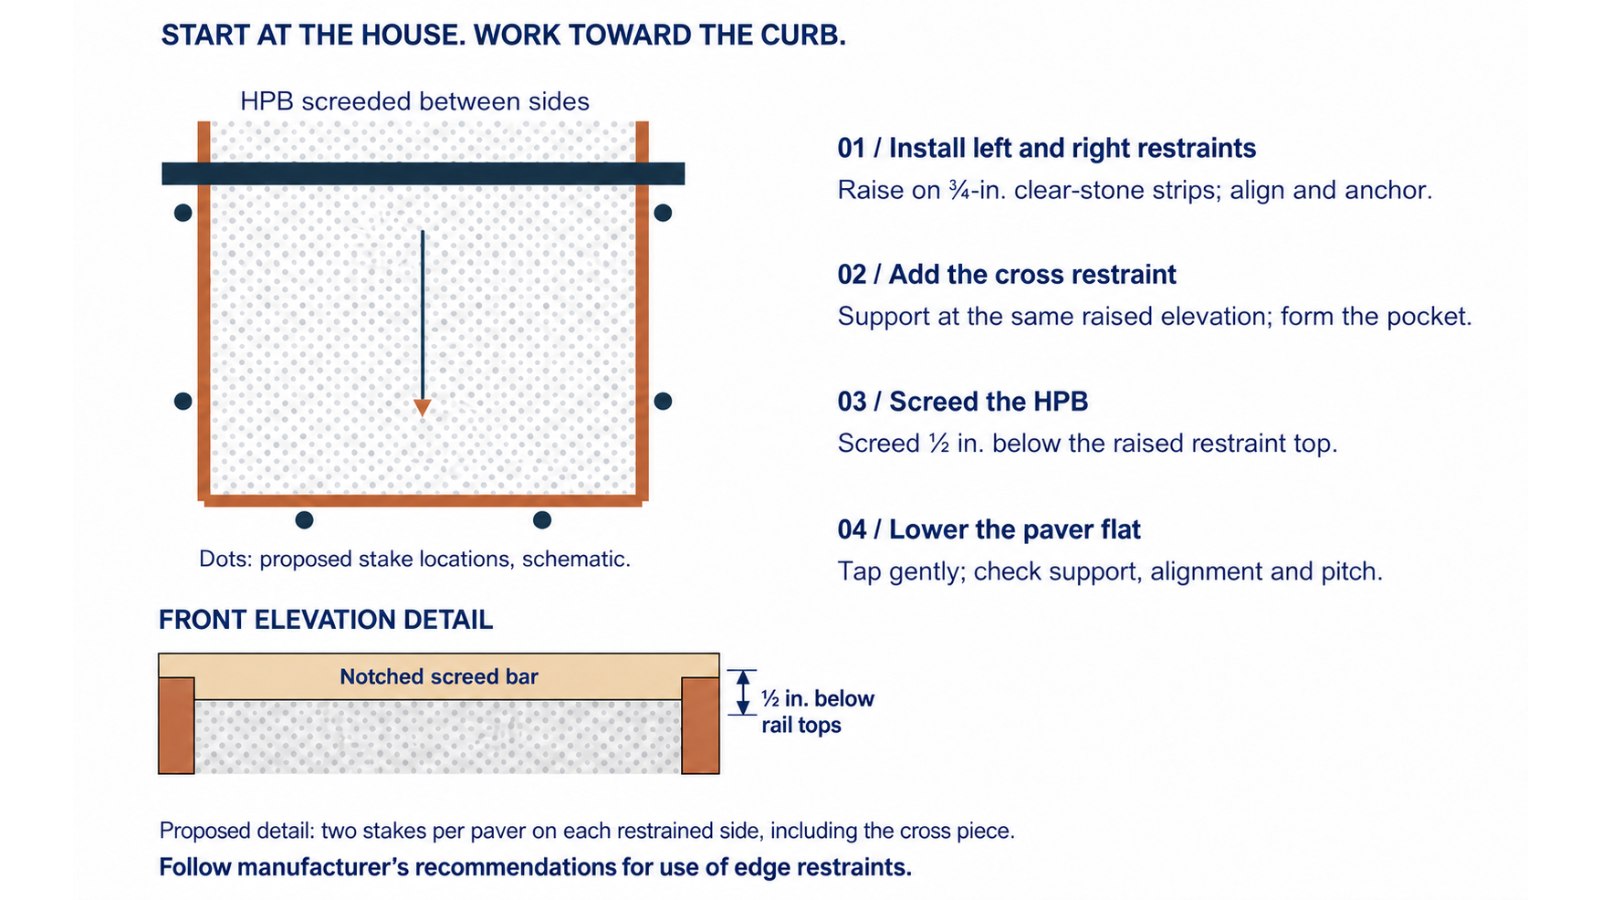
I used Quick-E Hybrid Edge, a low-profile restraint with stakes made for open-graded bases. Regular spikes need a dense base to grip, so they fail and pull out of loose stone.
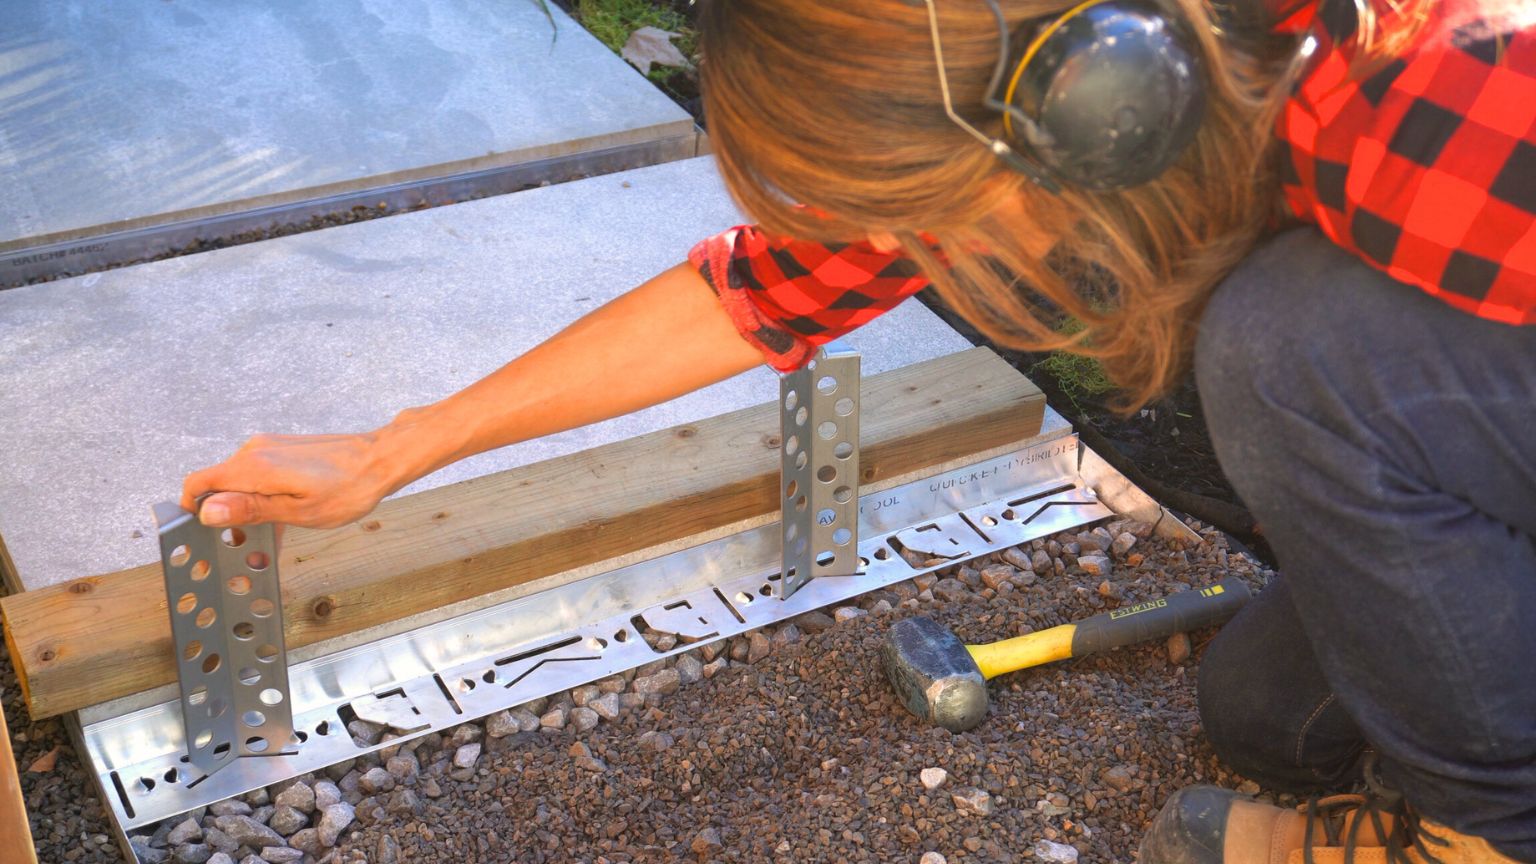
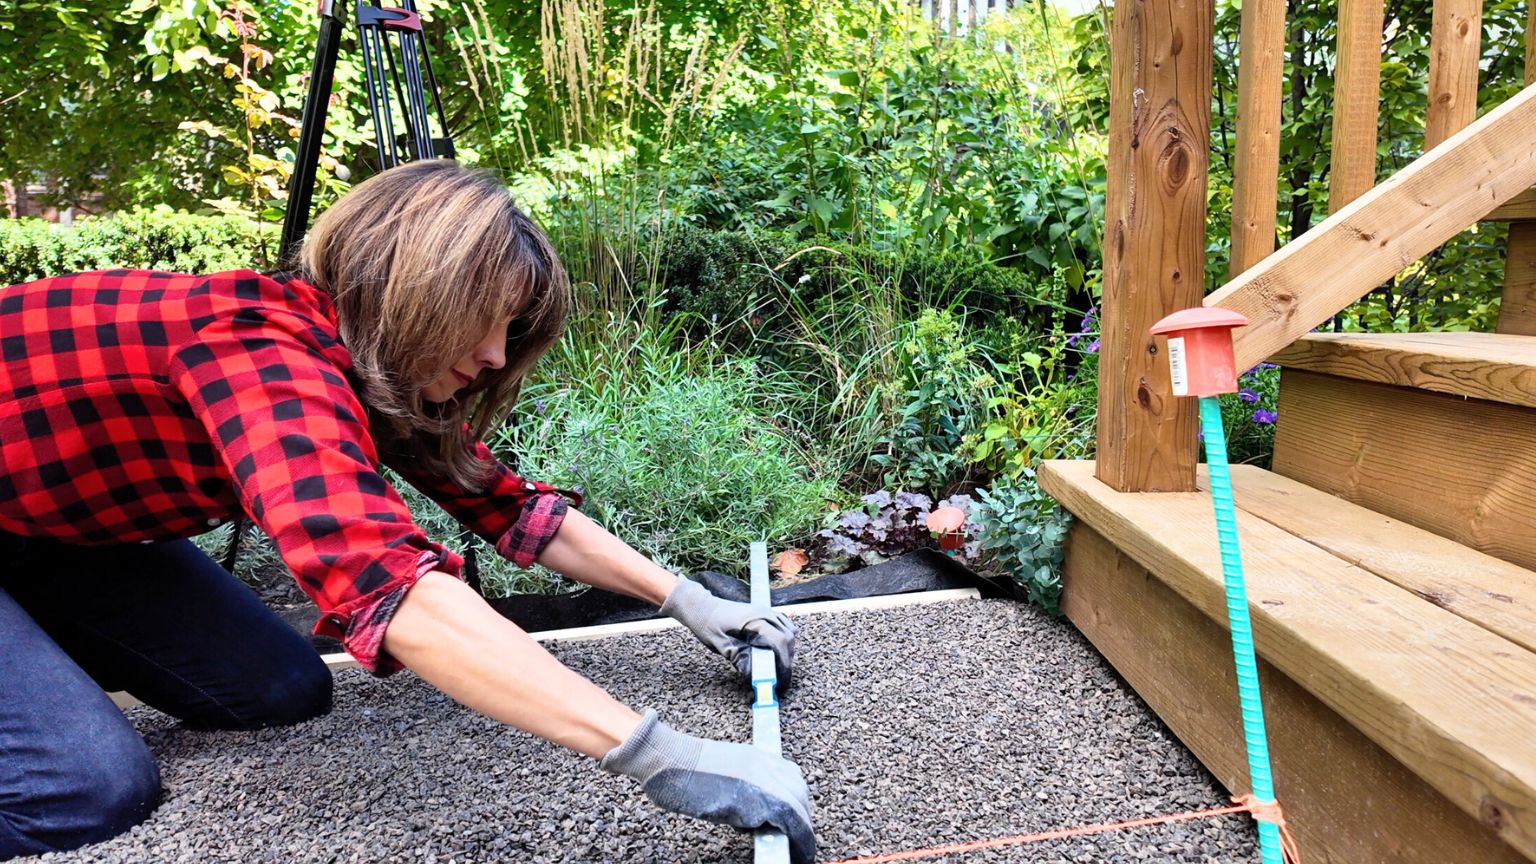
Check that the restraints are level from left to right before you stake them.
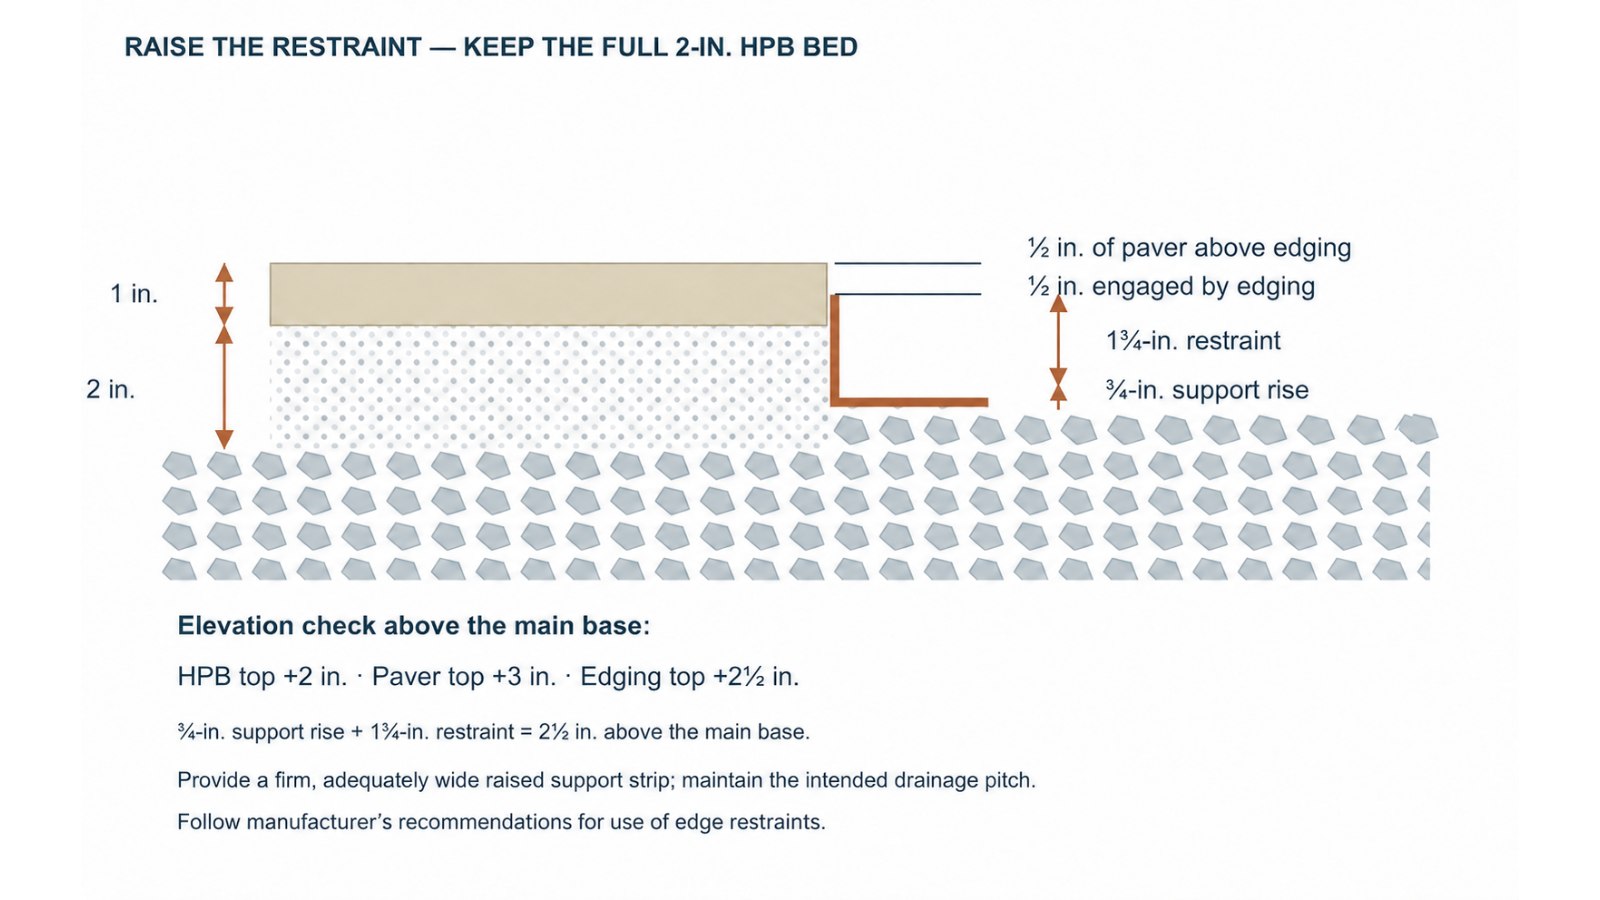
Screed the HPB with a notched bar riding the rails, ½ in. below their tops. Work from the house toward the sidewalk, one paver position at a time.
Install Limestone Pavers on HPB
Lower each 70 lb paver onto the HPB (two people makes it easy) and settle it gently with a dead blow hammer.
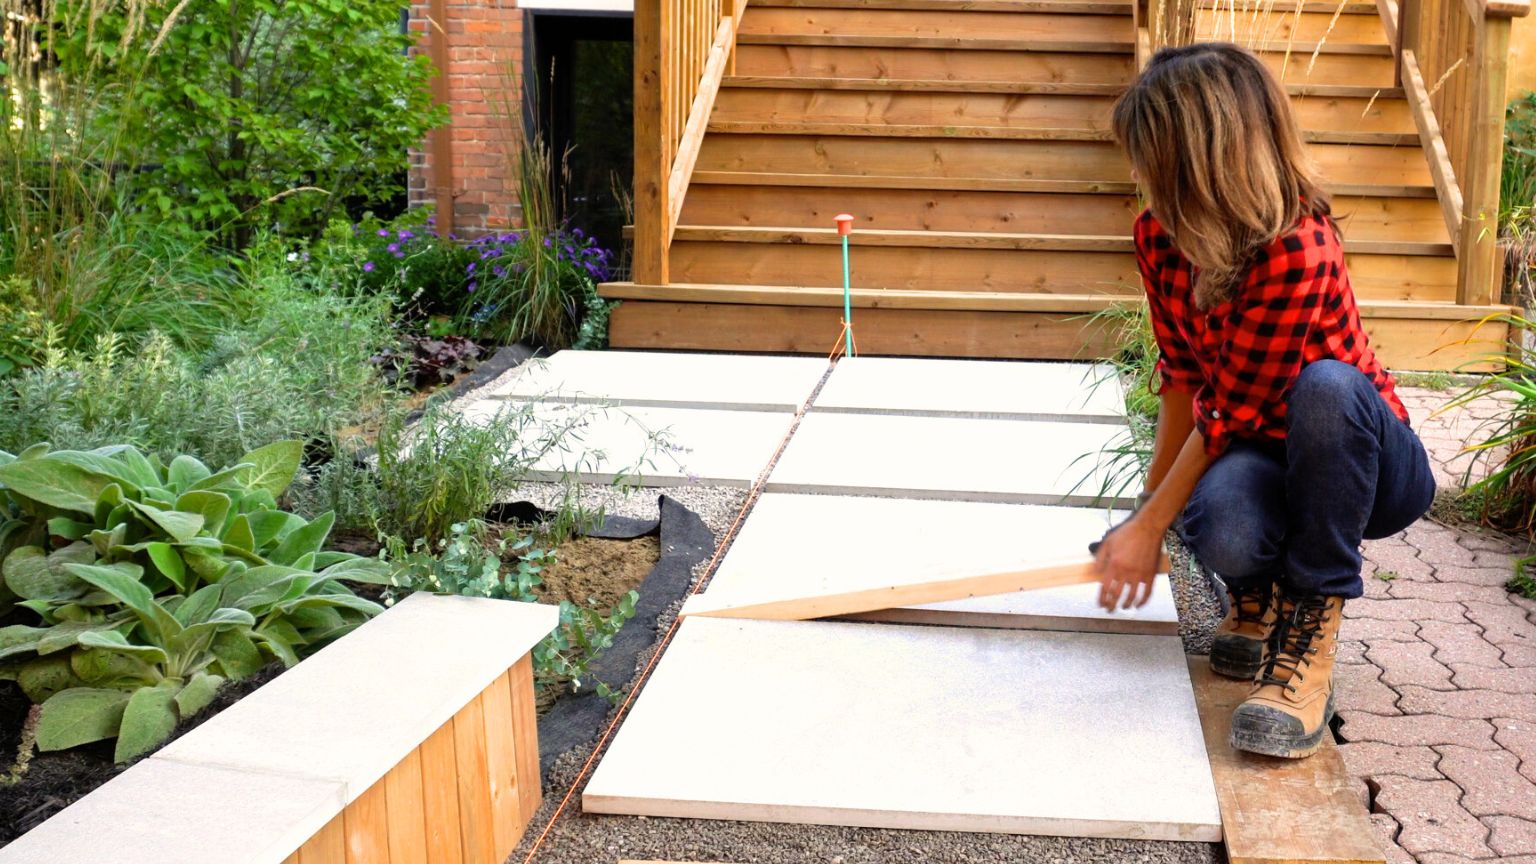
Check each paver with a level so it sits level side to side and fully supported, which keeps a 1 in. paver from cracking. Keep its top and bottom edges on the stringline. If it rocks, lift it and fix the bed.
I set the four-piece entry first with 1½ in. joints, then used a 2×4 as a spacer along the walk.
Seal Limestone Pavers and Finish the Walkway
Use the sealer your limestone manufacturer recommends; another product can void your warranty. I use a water-based impregnating sealer: test it in an inconspicuous spot, make sure the pavers are completely dry, then apply two coats.
I filled the joints with natural HPB and planted ground cover near the curb to keep the HPB off the sidewalk. Clean limestone with a non-acidic cleaner.
The Reveal
Eleven limestone pavers nestled among the planting, and the restraints disappear completely. It reads as a natural part of the garden, not something added to it.

Why Stepping Stones
Eight years after my first limestone walkway, I would choose it again. Calibrated limestone is timeless yet modern, and it works beautifully in this established Toronto neighborhood. The wider four-paver entry gives the stairs a proper landing, and the pavers sit low enough for the planting to come right up to their edges.
Modern landscaping is moving away from solid hardscapes and cold, wall-to-wall paving. Homeowners want calm, inviting, softer landscapes that reflect their lifestyle and support their well-being. A stepping stone walkway brings balance and harmony to a front garden, letting plants soften its edges, here with English lavender nestled along the borders. Looking down also grounds you in the present moment, giving you a quick reset and a moment of mindfulness as you enter your front garden.
Built and documented from a real Daru Dhillon project.